Table of Contents
ID MRZ RECOGNITION
1. What the MRZ is
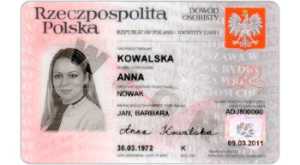
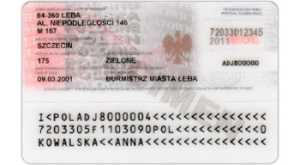
MRZ (ang. machine readable zone) – is a place in a different kind of documents, that contains data written in shorter way and using a special, machine readable letters. This zone helps computers to read the document in, for example, airport. Data in MRZ zone in personal ID are structured in 3 lines, 30 characters per line. It also contains characters from A-Z, number 0-9 and special character “<”, like in passports.
| Example of ID card | |
|---|---|
 |  |
2. Application description
Application are written in Python language (ver 2.7) with additional library- OpenCV. As a classifier in our neural network we use KNN (k-Nearest Neighbors) algorithm, that is already implemented in OpenCV library.
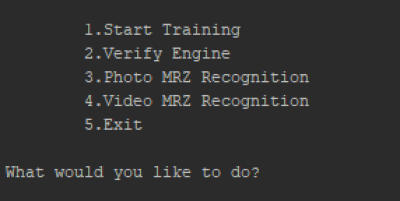
After application launch we can see menu:
2.1 Start Training
Supervised learning- it is a function, that generate neccessary data for KNN classifier.
Working algorithm:
| Step | Description |
|---|---|
| 1 | Shows file prepared by user which contains pattern data (characters are written using OCR-B font). In this file every character is prepared several time in a different size.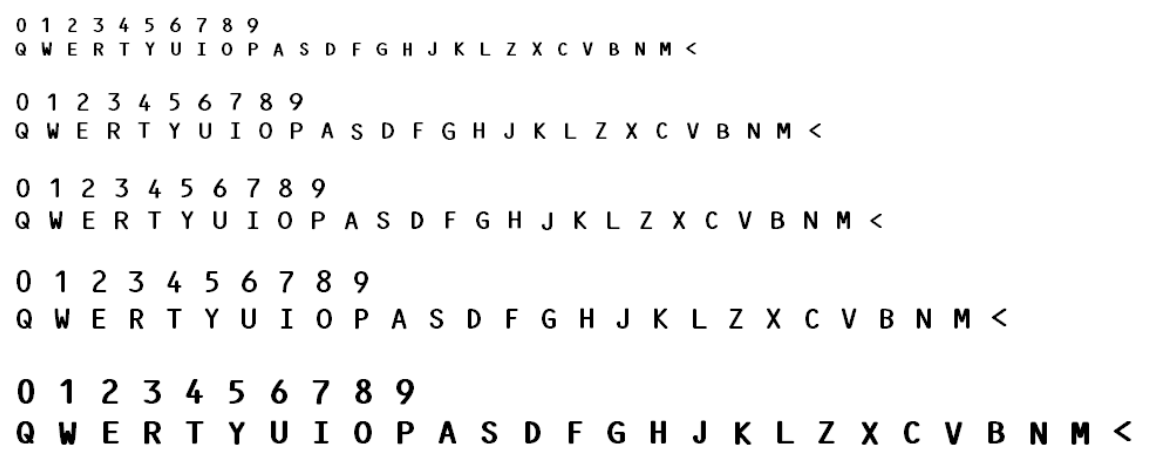 |
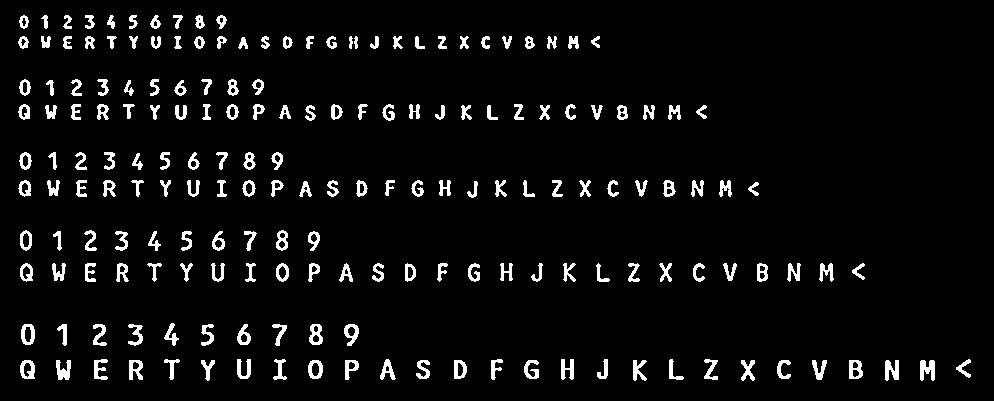
| 2 | Function put some neccessary filters on file with data:gray = cv2.cvtColor(im, cv2.COLOR_BGR2GRAY) blur = cv2.GaussianBlur(gray, (5, 5), 0) thresh = cv2.adaptiveThreshold(blur, 255, 1, 1, 11, 2)
In result we get: |
| 3 | In the next step function find characters, crop and scale it to size 20×20 pixels:image, contours, _ = cv2.findContours(thresh, cv2.RETR_EXTERNAL, cv2.CHAIN_APPROX_SIMPLE) for cnt in contours: if cv2.contourArea(cnt) > 20: [x, y, w, h] = cv2.boundingRect(cnt) if h > 10: im = copy.copy(im_copy) cv2.rectangle(im, (x, y), (x + w, y + h), (0, 0, 255), 2) roi = thresh[y:y + h, x:x + w] roismall = cv2.resize(roi, (20, 20))
In result we get 20×20 picture: |
| 4 | In the last step user is obligate to show computer what this letter is, writing it on keyboard. After this operation picture and the letter number is push to array in application memory. |
| 5 | When all characters are classified the arrays were save in drive np.savetxt('generalsamples.data', samples) np.savetxt('generalresponses.data', responses) |


2.2 Verify Engine
Testing and verification “knowledge level” of our neural network
| Step | Description |
|---|---|
| 1 | We initialize engine and load data to learning: self.samples = np.loadtxt("generalsamples.data", np.float32) self.responses = np.loadtxt("generalresponses.data", np.float32) self.model = cv2.ml.KNearest_create() self.model.train(self.samples, cv2.ml.ROW_SAMPLE, self.responses) |
| 2 | Function load picture with test data.  Picture above was prepared to pass the test with 100% accuracy. It is possibility to use in test data wrote in different font and verify how engine deal with this kind of data. It is possibility to positive interprate some characters in most of available font. Our team focus only on OCR-B font because it is used in ID card |
| 3 | We put necessary filters |
| 4 | Based on contours we extract single lines. We have to check that our application recognize 3 lines and if not we return “false”.ef extract_lines(self, image): line_list = {} # dilation cv2.imshow('input extract_line', image) kernel = cv2.getStructuringElement(cv2.MORPH_RECT, (10, 1)) img_dilation = cv2.dilate(image, kernel, iterations=3) # find contours image, contours, _ = cv2.findContours(img_dilation.copy(), cv2.RETR_EXTERNAL, cv2.CHAIN_APPROX_SIMPLE) for cnt in contours: [x, y, w, h] = cv2.boundingRect(cnt) # ic contour is big enough #print w * h if w * h > 5000: # wszystko co jest poniżej 5000 ignorujemy line_list[y] = [x, y, w, h] # sort contours print "Liczba Linii %s" % len(line_list) if len(line_list) == 3: return sorted(line_list.items()) else: print "Read Error, Detected Lines Count Error ! -> %s" % len(line_list) return None |
| 5 | We cut and extract pictures of each lines based on parameters from extract_lines function and we pass it to OCR function.def decode(self, image): if len(image) > 0 and image is not None: contours = self.extract_lines(image) MZR_lines = [] if contours is not None: for key, value in contours: # Get bounding box x, y, w, h = value line_image = image[y:y + h, x:x + w] MZR_lines.append(self.ocr(line_image)) cv2.imshow("linie", line_image) return MZR_lines return None |
| 6 | OCR function extract character from lines using extract_chars_from_line function: def extract_chars_from_line(self, image): image, contours, _ = cv2.findContours(image, cv2.RETR_EXTERNAL, cv2.CHAIN_APPROX_SIMPLE) char_list = [] i = 0 lista_rect = {} for cnt in contours: [x, y, w, h] = cv2.boundingRect(cnt) if cv2.contourArea(cnt) > 10: char_list.append([x, y, w, h]) lista_rect[x] = [x, y, w, h] return sorted(lista_rect.items()) Next based on returned character parameters OCR function cut picture, scale it to 20×20 pixels and pass it to neural network as output data. As returned infromation network give as a code of recognized character. def validate(self, read_data): print "Read Data: %s" % read_data print "Test Data: %s" % self.test_lines read_line_count = len(read_data) test_line_count = len(self.test_lines) PASS_COUNT = 0; FAIL_COUNT = 0; if (test_line_count == read_line_count): for i in xrange(read_line_count): read_line_data = read_data[i] test_line_data = self.test_lines[i] if (len(read_line_data) == len(test_line_data)): for x in xrange(len(read_line_data)): if read_line_data[x] == test_line_data[x]: PASS_COUNT += 1 else: FAIL_COUNT += 1 else: return None else: return None print "Validation Summary: PASS: %s, FAIL: %s" % (PASS_COUNT, FAIL_COUNT) Accuracy = float(float(PASS_COUNT) / float(PASS_COUNT + FAIL_COUNT)) * 100 return Accuracy |
| 7 | Returned string in form of 3 lines array we compare with our prepared pattern. Counting all positive and negaive recognition we calculate accuracy of our engine.def validate(self, read_data): print "Read Data: %s" % read_data print "Test Data: %s" % self.test_lines read_line_count = len(read_data) test_line_count = len(self.test_lines) PASS_COUNT = 0; FAIL_COUNT = 0; if (test_line_count == read_line_count): for i in xrange(read_line_count): read_line_data = read_data[i] test_line_data = self.test_lines[i] if (len(read_line_data) == len(test_line_data)): for x in xrange(len(read_line_data)): if read_line_data[x] == test_line_data[x]: PASS_COUNT += 1 else: FAIL_COUNT += 1 else: return None else: return None print "Validation Summary: PASS: %s, FAIL: %s" % (PASS_COUNT, FAIL_COUNT) Accuracy = float(float(PASS_COUNT) / float(PASS_COUNT + FAIL_COUNT)) * 100 return Accuracy |
2.3 Photo MRZ Recognition
This module is responsible for decoding MRZ zone from static picture. Algorithm works like this:
| Step | Description |
|---|---|
| 1 | Application turn on camera and shows image, user are taking picture using 'space' on keyboard. The 'q' key turn off program and goes to main menu:def capture_process(self, cam): cap = cv2.VideoCapture(cam) while (True): ret, frame = cap.read() gray = cv2.cvtColor(frame, cv2.COLOR_BGR2GRAY) cv2.imshow('Camera data input', gray) key = cv2.waitKey(1) if chr(key & 255) == ' ': thresh = self.filtr(gray) text = self.locate_MZR(thresh, gray) print text if chr(key & 255) == 'q': break |
| 2 | When picture are taken necessary filters are put and picture is passing to function. Original picture and picture with filters is passed to locate_MRZ function which localize and extract MRZ from picture.Filtr() function which localize MRZ zone on ID:def filtr(self, image): rectKernel = cv2.getStructuringElement(cv2.MORPH_RECT, (13, 5)) sqKernel = cv2.getStructuringElement(cv2.MORPH_RECT, (21, 21)) # load the image, resize it, and convert it to grayscal # smooth the image using a 3x3 Gaussian, then apply the blackhat # morphological operator to find dark regions on a light background gray = cv2.GaussianBlur(image, (5, 5), 0) blackhat = cv2.morphologyEx(gray, cv2.MORPH_BLACKHAT, rectKernel) # compute the Scharr gradient of the blackhat image and scale the # result into the range [0, 255] gradX = cv2.Sobel(blackhat, ddepth=cv2.CV_32F, dx=1, dy=0, ksize=-1) gradX = np.absolute(gradX) (minVal, maxVal) = (np.min(gradX), np.max(gradX)) gradX = (255 * ((gradX - minVal) / (maxVal - minVal))).astype("uint8") # apply a closing operation using the rectangular kernel to close # gaps in between letters -- then apply Otsu's thresholding method gradX = cv2.morphologyEx(gradX, cv2.MORPH_CLOSE, rectKernel) thresh = cv2.threshold(gradX, 0, 255, cv2.THRESH_BINARY | cv2.THRESH_OTSU)[1] # perform another closing operation, this time using the square # kernel to close gaps between lines of the MRZ, then perform a # series of erosions to break apart connected components thresh = cv2.morphologyEx(thresh, cv2.MORPH_CLOSE, sqKernel) thresh = cv2.erode(thresh, None, iterations=4) # during thresholding, it's possible that border pixels were # included in the thresholding, so let's set 5% of the left and # right borders to zero p = int(image.shape[1] * 0.05) thresh[:, 0:p] = 0 thresh[:, image.shape[1] - p:] = 0 return thresh
Result of function: white places are the localized text area: def locate_MRZ(self, _thresh, _oryginal): _oryginal = cv2.adaptiveThreshold(_oryginal, 255, 1, 1, 11, 2) cnts = cv2.findContours(_thresh.copy(), cv2.RETR_EXTERNAL, cv2.CHAIN_APPROX_SIMPLE)[-2] cnts = sorted(cnts, key=cv2.contourArea, reverse=True) if len(cnts) > 0: (x, y, w, h) = cv2.boundingRect(cnts[0]) # Shape[1] jest najwiekszy zatem to zawsze bedzie MZR pX = int((x + w) * 0.03) pY = int((y + h) * 0.03) (x, y) = (x - pX, y - pY) (w, h) = (w + (pX * 2), h + (pY * 2)) result = _oryginal[y:y + h, x:x + w].copy() return self.decode(result)
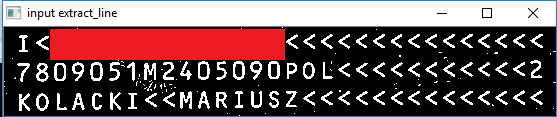
Result of locate_MRZ function: |
| 3 | This picture are passing to Decode function which cuts picture of every line based on returned parameters of extract_lines function and pass it to OCR function.def decode(self, image): if len(image) > 0 and image is not None: contours = self.extract_lines(image) MZR_lines = [] if contours is not None: for key, value in contours: # Get bounding box x, y, w, h = value line_image = image[y:y + h, x:x + w] MZR_lines.append(self.ocr(line_image)) cv2.imshow("linie", line_image) return MZR_lines return None |
| 4 | OCR function extract characters of every line using extract_chars_from_line function: def extract_chars_from_line(self, image): image, contours, _ = cv2.findContours(image, cv2.RETR_EXTERNAL, cv2.CHAIN_APPROX_SIMPLE) char_list = [] i = 0 lista_rect = {} for cnt in contours: [x, y, w, h] = cv2.boundingRect(cnt) if cv2.contourArea(cnt) > 10: char_list.append([x, y, w, h]) lista_rect[x] = [x, y, w, h] return sorted(lista_rect.items()) Next, based on returned character parameters, OCR function cuts picture, scale it to 20×20 pixels and pass it to KNN network as an input data. As an output information network returns code of recognized character. def ocr(self, image): self.clear_folder('./log/ocr_img/') result = "" chars = self.extract_chars_from_line(image) i = 0 for key, value in chars: x, y, w, h = value if h > 10: # cv2.rectangle(oryginal,(x,y),(x+w,y+h),(0,255,0),2) # cv2.imshow('oryginal', oryginal) roi = image[y:y + h, x:x + w] roismall = cv2.resize(roi, (20, 20)) file_name = "./log/ocr_img/%s" % i self.save_image_to_png(roismall, file_name) roismall = roismall.reshape((1, 400)) roismall = np.float32(roismall) retval, results, neigh_resp, dists = self.model.findNearest(roismall, k=1) string = str(chr((results[0][0]))) result += (string) return result |
| 5 | Result are printed to console. |
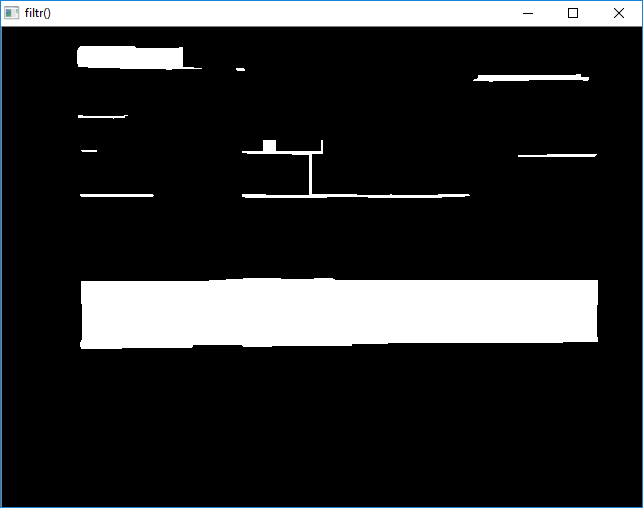 Next step is to pass this picture to locate_MRZ function which assumes that the largest white place of them are the MRZ and based on that cut data from original picture:
2.3 Video MRZ Recognition
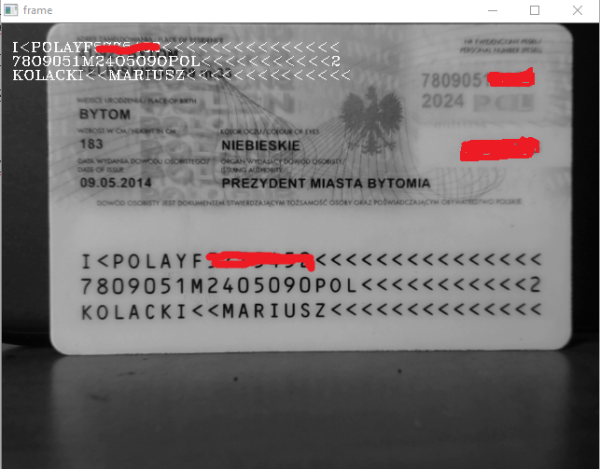
The task of this module is decoding MRZ zone in 'live' mode based on data stream from camera in real time. This function doesn't require using a space bar on keyboard becuse everything are automatically decoded. When application found 3 lines on MRZ zone, data are decoded and result are passed to output data stream. Decoding are made in the same way as Photo MRZ Recogition option described above. Decoded information are shown in the left upper corner